Fast, Easy Assembly
 Only One Tool Needed:
- Rubber Mallet
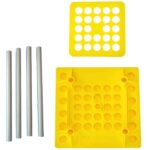
Parts Included:
- One 12″ (30.48 cm) x 12″ (30.48 cm) Plastic Top
- Four 17″ (43.18 cm) Aluminum Tubes
- One 17″ (43.18 cm) x 17″ (43.18 cm) Plastic Base
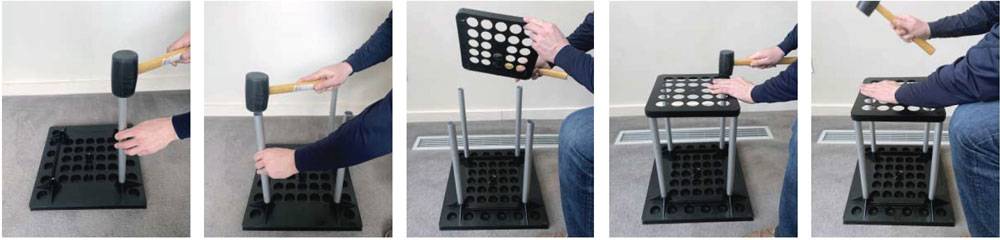
Place the plastic base on a solid surface preferably concrete. Install each of the four legs into the raised holes on the four corners of the base. Use the rubber mallet making sure each leg is firmly seated. Install the top over the four legs and use the rubber mallet to secure each one.
Choose a Location & Place Tools into the Rack
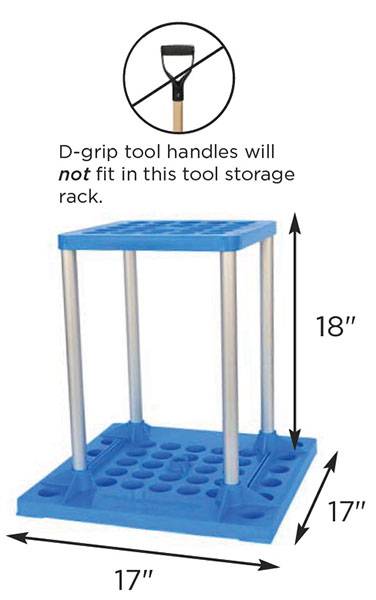
Do not attempt to move the tool storage rack fully loaded with tools. Place it in your preferred location and then add the tools. Be sure to place it in a location with plenty of overhead clearance to allow your longest tool to lift up and out of the rack. This rack fits 24 tools with handles up to 1.375″ in diameter. It will not fit tools with a D-grip design handle.
If you have additional questions about assembling or using this tool storage rack you can contact Mr. LongArm’s Customer Service Department at 816-537-6777 or 1-800-821-3508. You can also use our Customer Contact form.