Cutting in is the final prep you do before painting an entire wall. You are basically outlining the area where you will be painting and getting any tight areas you can’t get with a roller. You’ll be painting the ceiling line, wall edges, corners and above baseboards. You will also want to paint around window and door trim, electrical outlets, light switches and heating and cooling vents.
Trim Smart Paint Edger
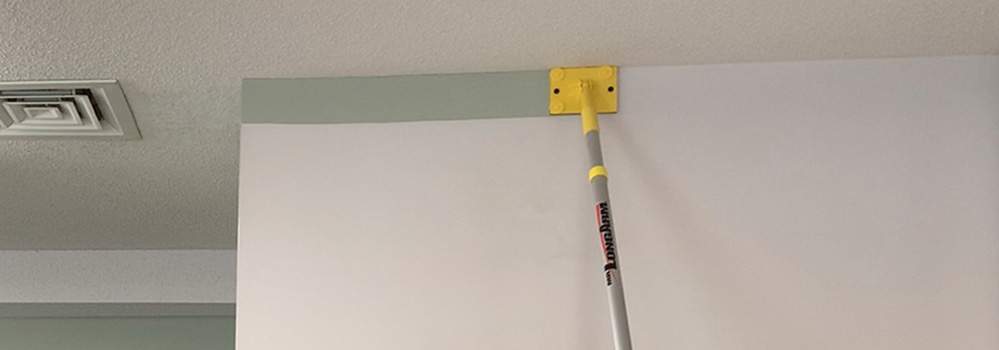
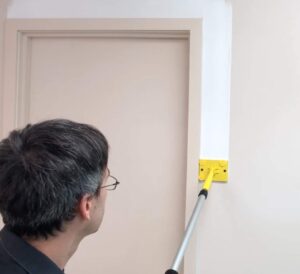
The Trim Smart Paint Edger offers an easy way to cut in. It’s especially useful when painting rooms with high ceilings. The edger can be used by hand or attaches to any standard threaded extension pole. A swivel handle keeps the paint pad flush with flat surfaces. If you can’t or simply don’t want to climb a ladder to cut in higher walls, this is a great option for you.
Horizontal and vertical guide wheels provide a buffer between your paint pad and the surface you want to protect. They keep your lines straight and allow you to paint both up and down and side to side depending on what you are painting around. Needless to say it is very important to keep paint off the wheels and edges of the paint pad.
Painting Corners with the Edger
When painting corners with our edger you should face the side of the pad that has no wheels into the corner. Otherwise you may end up with a gap in the center of your corner and most likely get paint on your wheels. We also offer a Corner Painter for this purpose or you can simply use a brush.
Best Way to Load the Paint Pad
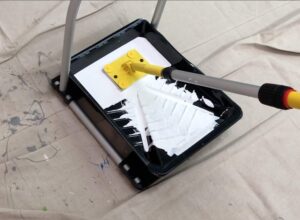
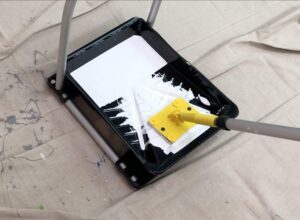
There are a couple of ways to load paint onto the pad. The easiest and most effective way is to use a paint tray and dip the surface fibers only into the paint and then lightly push the pad downward on the ramp of your tray. A second option is to apply the paint directly onto the top of the pad using a paint brush. Just remember to make sure you keep paint off of the wheels and edges of the pad itself.
Practice Makes Perfect
Whether cutting in using a brush or a paint edger there will be a learning curve so practice a little before you start your project.
Here are some additional tips:
- Take your time when cutting in, its better to go slow
- Save yourself many trips up and down a ladder by using an extension pole
- To avoid drips, don’t use too much paint and don’t press too hard
- Always check the wheels for paint to avoid having paint transfer onto the surface they are contacting
- For a more even finish, cut in and paint one wall at a time so that your cut in paint won’t already be dry when you begin rolling
- If you will be applying multiple coats of paint, be sure to cut in on every one
- While it is possible to cut in without taping, you should consider using tape if you’re new at painting, using a bold color or not repainting your trim paint

Pad Replacements and How to Replace the Pad
You should consider purchasing at least one pad replacement when you purchase your edger. The pads clean up fairly easily and are reusable but depending on the type of paint and color it would be a good idea to have a fresh pad for each color you will be painting. Removing and replacing the pad is easiest when you use a screwdriver as shown in our pad replacement video. Watch video