Do you have a tired looking deck that looks like it’s seen better days? It’s probably time to give it a fresh stain. Staining your deck will certainly make it easier on the eyes as well as protect the wood from warping. When it comes to deck staining, Mr. LongArm has created multiple products in our Woodmates line that can solve every problem that a DIYer could encounter. For this guide we will assume you have already decided that the deck needs staining. Also, be warned that the weather plays a significant part in this project. To achieve the very best results you need about 72 total hours (3 days) without rain if you are going to do everything in as short a period of time as possible. Without further ado (before it rains) let us start with preparing the deck.
Preparation & Cleaning
- Remove everything from the deck. The last thing you want to do is get deck stain on your furniture or plants.
- Prepare the deck by sanding any splintered spots, hammering in any loose nails or tightening any loose screws. For the sanding, use 60 to 80 grit sandpaper on the main deck boards and 80 to 100 grit on the handrails. While you don’t have to be as precise in your sanding as Daniel LaRusso in “The Karate Kid” it definitely is important if you plan on using your deck to practice karate barefoot or just don’t enjoy wearing shoes. If you have access to a belt sander or pole sander both will speed up the process.

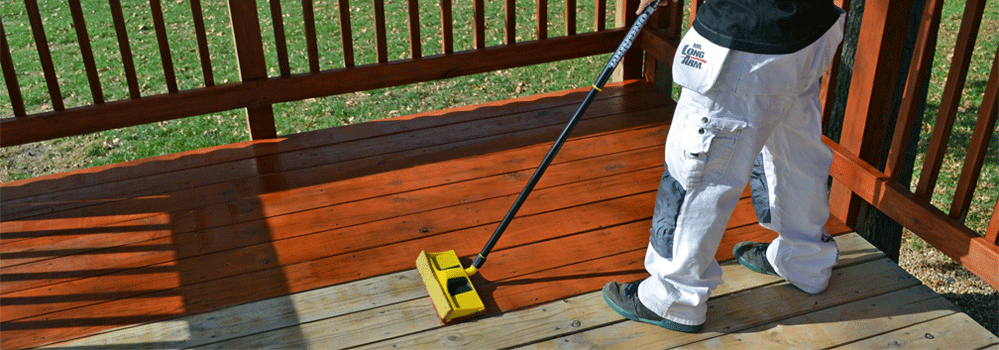
8689 Tele-Wash Water-Fed System is the perfect deck cleaning tool. - Get all debris and dirt off the deck by sweeping, be very thorough.
- The Tele-Wash Water-Fed System can be used to apply the Deck wash and scrub the wood. Follow the directions found on the container of your favorite deck wash. The importance of this step can’t be overstated, the deck needs to be clean before staining and must also be dry. Check the weather forecast and allow your deck 24 hours to dry preferably in warm sunny weather.

Stain Application
- Sweep off the deck one more time before you begin staining.
- Stir the selected stain and pour it into a paint tray. Woodmates stain pads can apply either oil based or water based stains. The biggest differences between the two are that oil based stains are easier to apply. While water based are more durable and last longer along with being more environmentally friendly.
- Tape off areas where the deck meets the house or any other areas you don’t want to get stain on. Painter’s tape should do the trick.
-
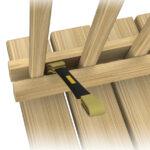
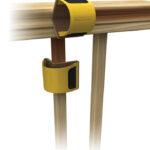
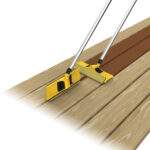
0368 Double-end Stain Applicator 0360 Contour Stain Applicator Stain the Railings, Balusters, and Spindles first. Thanks to Mr. LongArm’s Contour Stain Applicator and Double-End Stain Applicator staining these awkward spots is exponentially easier than in the past. The Contour will flex to fit the shapes of any railings, balusters, or spindles. Meanwhile, the Double-End will reach in between small spaces and cracks to make sure no spot is left unstained.
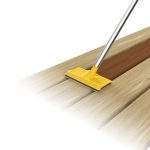
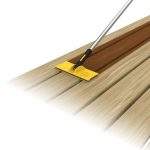
- Stain the deck boards. Mr. LongArm offers three different sizes of Stain Applicators; 7-inch Basic, 9-inch Standard, and 12-inch Premium. The 7-inch is perfect for smaller, more simple decks. While the 9-inch with its ability to pivot can also stain gaps between boards. Our top-of-the-line 12-inch covers two boards at once and is perfect for large decks. It does require a paint tray that is at least 13″ wide. It also has a 180 degree swivel head perfect for decks with different angles that require flexibility. The 12-inch also has a built-in gap tool that can stain both sides of the gaps between boards.
0331 Basic Deck Stain Applicator 0330 Standard Deck Stain Applicator 0350 Premium Deck Stain Applicator All three of these applicators work extremely well attached to a light weight extension pole such as our Twist-Lok or Pro-Pole. The technique is different from painting as you want to follow the direction of the woodgrain, staining the boards in long even strokes. Taking care not to go over areas you have already stained.
Finish. Up. & Enjoy
Allow the stain time to dry, at least 24 hours in the sunlight, if not more.
Staining your deck might be time consuming, but it is well worth the effort. Plus, the Woodmates line will certainly help speed up the process and make things a lot easier. When done correctly, deck stain will last up to three years before it needs to go through the process again. Now, go enjoy that backyard barbecue with your friends and family who will certainly be in awe of your beautiful deck.
Related Article: Tips for Using Woodmates® Deck Stain Applicators
2 thoughts on “Staining a Deck Step-by-Step with Woodmates® Applicators”
I want to get even distribution of the stain across the Mr. Long Arms stain pad. What type of paint tray do you recommend for use with your 12″ premium Stain Applicator?
Good question. Through the years and in speaking to many, many people about staining decks, the conclusion is that a combination of techniques are used and produce equally good results. For example how a stain pad is loaded to distribute the stain evenly across the pad is as important as the type of stain used and the pressure applied during the deck staining.
Having said that, there are several types of trays available. The 12” premium stain applicator will need a tray that’s at least 13” wide. A good tray will have enough room for you to dip the pad into the stain and a good roll off area where you can push down on the pad to release excess stain.