Want to know how to stain a small deck? Many first-time homeowners or young families will purchase a home with a smaller wooden deck that is in less-than-ideal condition. While it might not require replacement or new lumber, that old deck needs something to bring it back to life. That something is a good cleaning and a fresh coat of stain. Staining a small deck is a relatively easy DIY project that doesn’t cost much or take a long time. Mr. LongArm has the perfect products to get you started and make this task much easier.
*A typical small starter deck is around 12 x 12 feet or smaller.
Preparation:
- Choose a stain. Stains are largely water-based nowadays, they are more environmentally friendly and durable than oil-based stains. A good rule of thumb to choose stain color/opacity is that the better the quality of wood (usually newer lumber) the more transparent the stain to show off the natural beauty of it. But you can also use a more solid stain if that looks best to you, ultimately it is a matter of personal preference. If you need more help check out this link from Family Handyman on how to choose a deck stain.
- Check the forecast. Ideally you will need about 72 hours without any rain to allow time for the deck boards to be completely dry.
- Clear off the deck. Remove everything from the deck. Start out by sweeping all the dust and debris, a leaf blower might work best as it will get everything out of the cracks and crevices.
Cleaning:
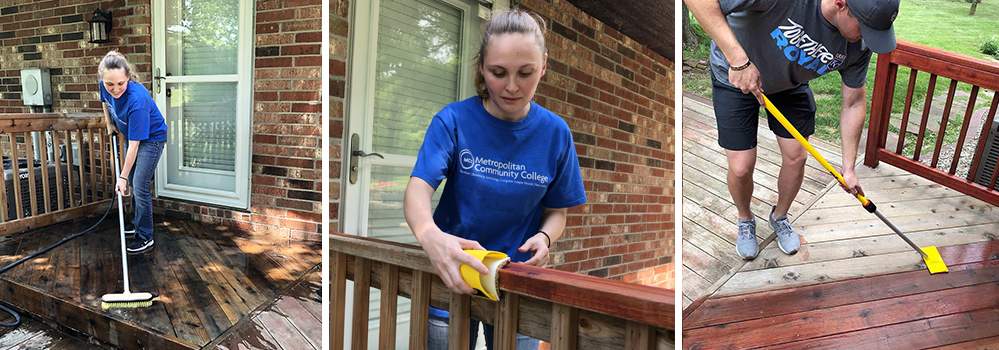
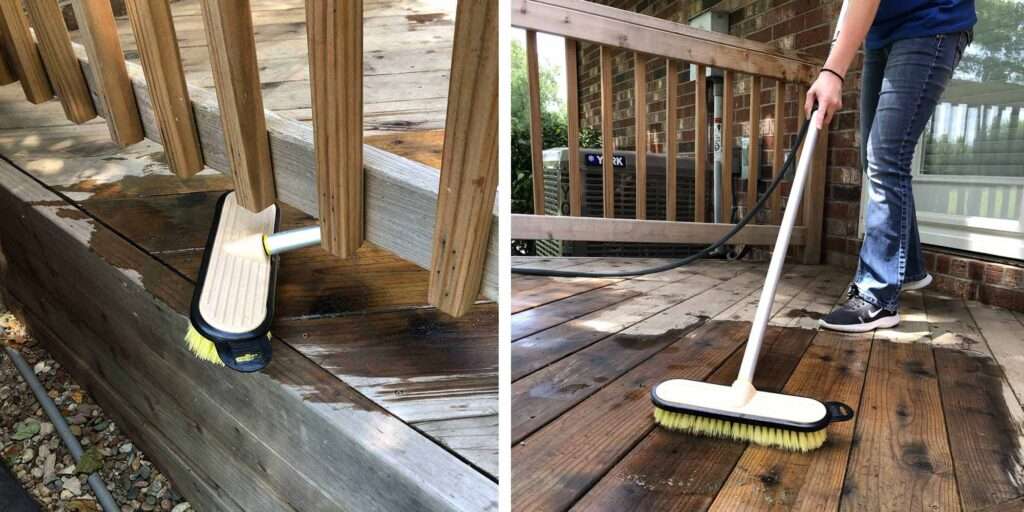
- Wash the deck. Use deck wash that can be purchased from the nearest hardware store or make your own with recipes from tipnut.com. This will help get rid of any dirt, mildew, sap, or algae growth that has built up on the deck boards. Mr. LongArm has the perfect way to apply and rinse off the deck wash, the Tele-wash Water-Fed System. This pole/brush combo has stiff bristles to apply the deck wash plus can hook up to the hose to spray water as you clean the boards, helping get rid of the more stubborn dirt/mildew spots.
- Let the Deck Dry. Give the deck 24 hours to completely dry before moving on to apply stain.
Staining:
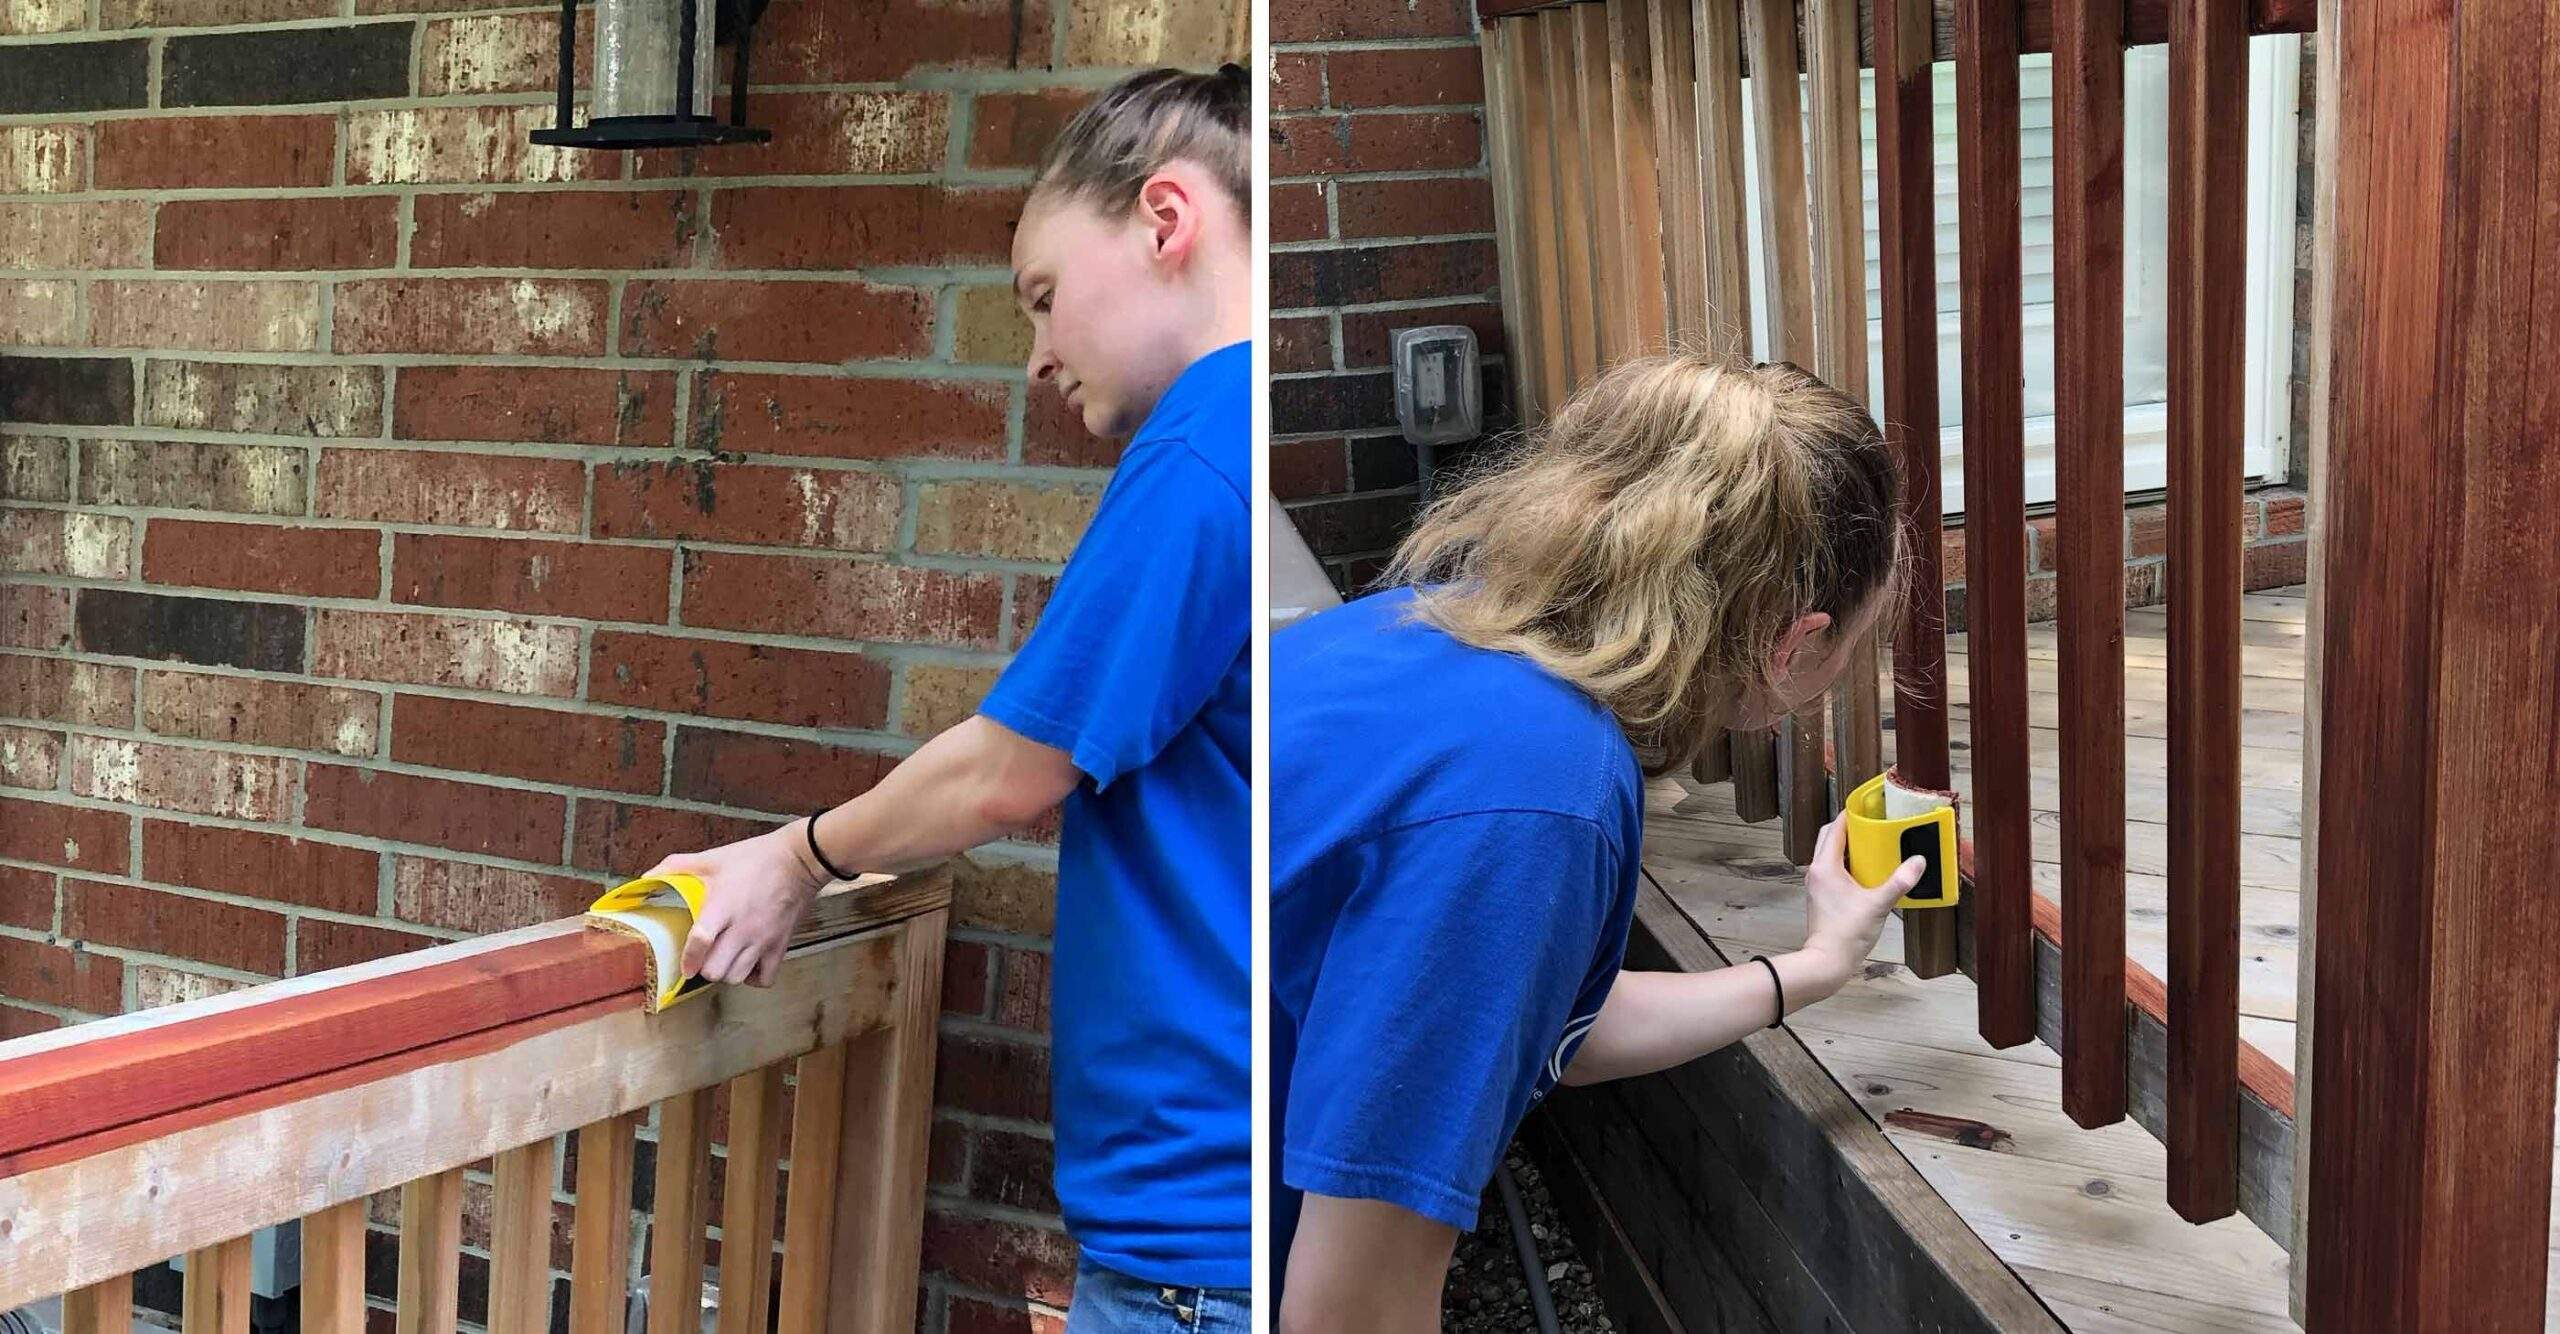
- Apply Stain Starting with Railing, Balusters and Spindles. Using the Woodmates Contour Stain Applicator, start staining the railing, balusters and spindles first (if your deck has them). The Contour Stain Applicator can flex in/out to fit different shapes such as balusters, rails and spindles. Be sure to not overload the Applicator with stain and press somewhat firmly against the surface when applying stain. Use a small paint brush to get the hard to reach areas that not even the Contour Applicator can access.
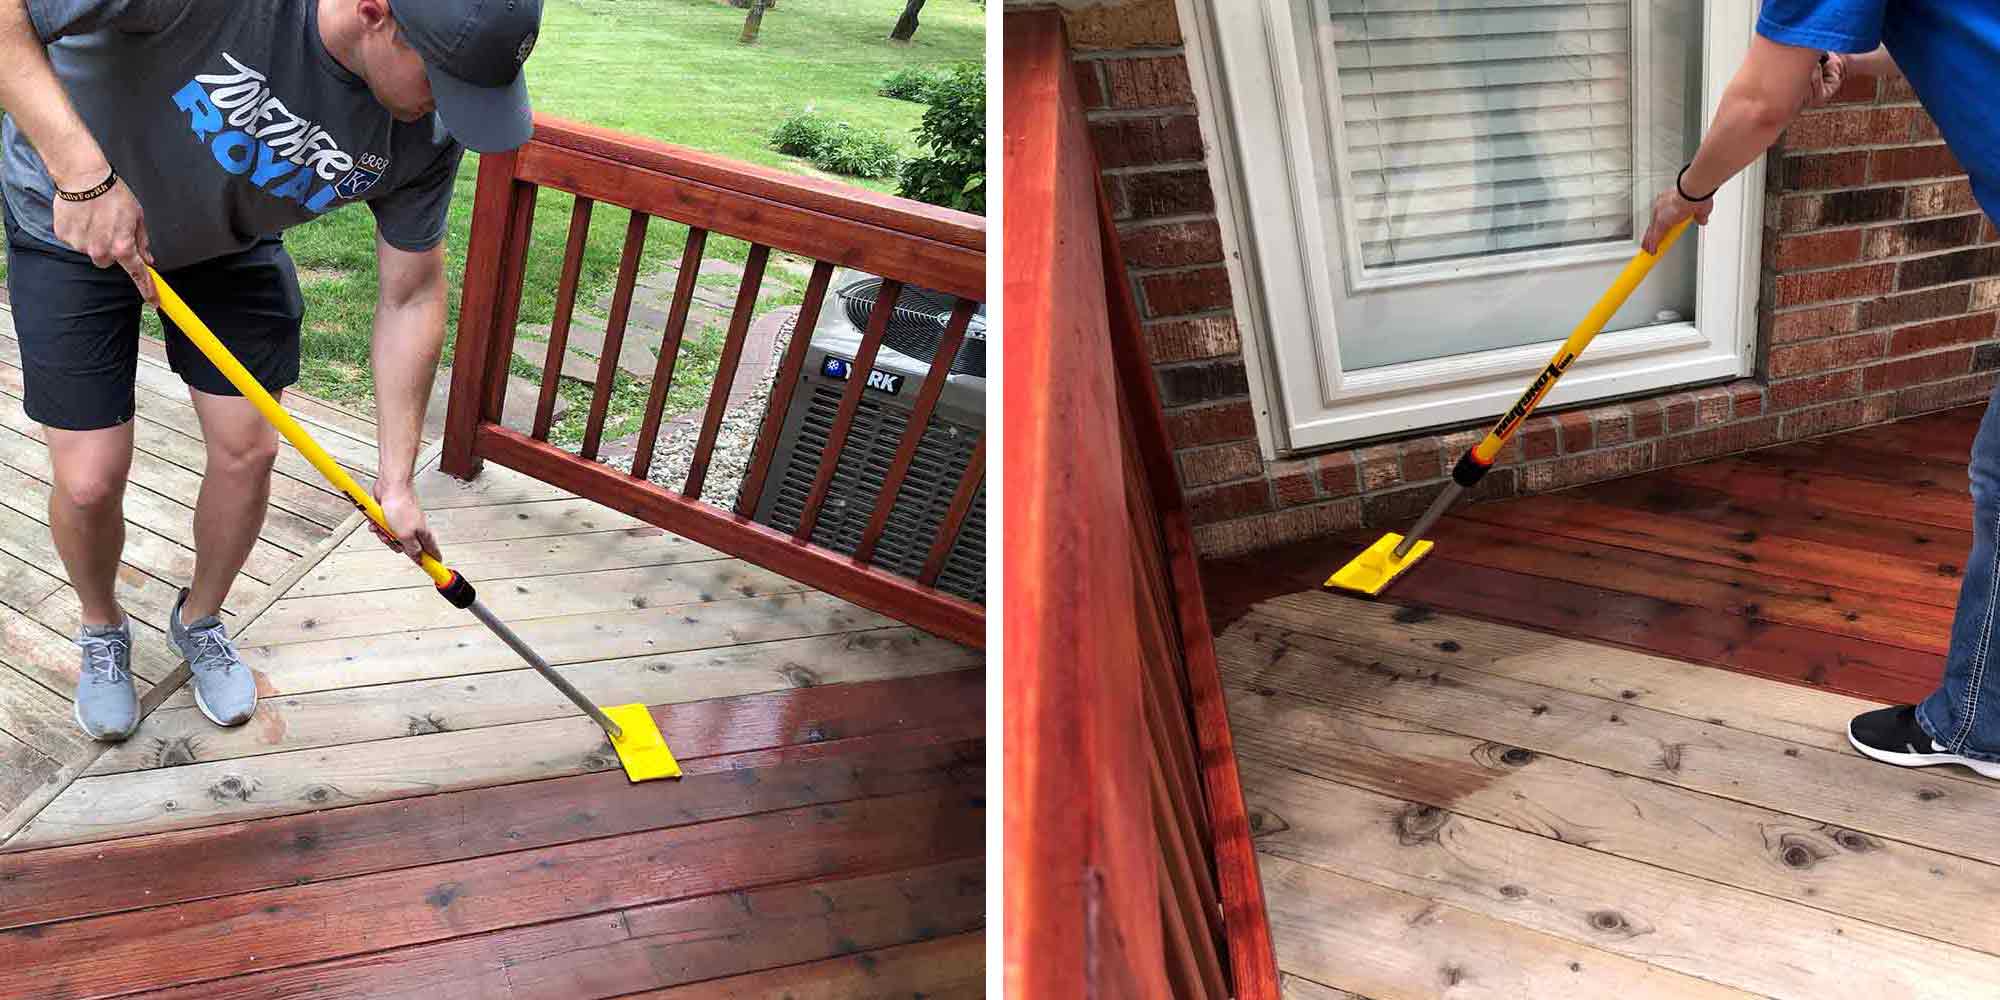
- Stain the Deck Boards. Use either our 7″ Basic or 9″ Standard Stain Applicator to stain the deck boards. Apply the stain with the grain of the wood for less resistance and do so in one long, continuous stroke for the best results. Unlike painting a house, you want to avoid going over the same spot multiple times, this could make for an uneven appearance to the stain.
- Wait the recommended amount of time for the stain to dry or 24 hours to be safe. Some stains take longer to dry and some shorter, overall, it should not take any longer than a day. If it rains unexpectedly you might have to redo the job. That’s why it is incredibly important to choose a 72-hour time-period of hot and dry weather.
Party Time:
- Put the grill back on the deck and get the burgers going, you deserve a treat after all your hard work!
Doing something for the first time can be intimidating, especially a big DIY project like staining a deck, but it doesn’t have to be. Take advantage of our Stain Applicator Kit and this guide to transform that small deck into a space to be proud of. There is no need to spend a fortune on hiring someone or buying a sprayer. Now, go enjoy that deck and be sure you brag to your friends about how you did it yourself!